Jun 04, 2025 | Flooring America
Your kitchen is the heart of your home, the place where stories are shared and memories are made around the table. If you're ready to give your kitchen a whole new look, the backsplash is the perfect place to start.
As your friendly flooring partners, we help homeowners bring their whole kitchen together, from the backsplash down to the floors beneath your feet. Whether you're drawn to timeless classics or bold, modern designs, the right tile can completely change how your kitchen feels. Read on to explore ideas, trends, and practical tips to help you find the perfect backsplash for your kitchen.
A backsplash serves a few important purposes:
Backsplash tile is typically made from natural stone, glass, porcelain, or ceramic, and it's installed behind your sink, stove, and countertops.
Whether you love a look that never goes out of style or want to try something a little more current, there's a backsplash style to match your vision.
If you want a look that always feels classic, you can't go wrong with subway tile. It's simple, versatile, and you can dress it up or down depending on your grout color and layout.
A classic horizontal brick pattern in white is still a favorite, especially paired with light colored grout for a clean, timeless look, or dark grout if you want more contrast and a modern edge. If you want more movement, herringbone and vertical layouts turn that same tile into something with real texture. As a rule of thumb:
Pro Tip: blending subway tile with marble or wood accents adds texture and depth, giving your kitchen a layered, collected look.
If you love a little history in your kitchen, vintage-inspired tile can bring old-world charm without feeling dated. These tiles usually feature intricate patterns, from Moroccan-style motifs to classic Victorian designs, printed or molded right into the surface.
Because the pattern does so much of the visual work, this style pairs best with simple cabinetry and countertops that won't compete for attention. As a rule of thumb:
Modern trends are leaning into bold patterns, vibrant colors, and materials that feel a little more special.
Beyond pattern and color, the material you choose changes the whole feel of your kitchen. Here are a few directions worth exploring.
Glass tile adds light and openness to a kitchen. A glossy finish reflects more light around the room, which is especially nice if you don't get a lot of natural sunlight, while a frosted finish gives you that same brightness with a softer look. Glass also wipes clean easily, making it a practical choice for the busiest zone in your kitchen.
Marble and slate bring an earthy, timeless elegance that's hard to replicate. The unique veining in marble or the rich texture of slate means every slab has its own personality, so no two kitchens ever look quite the same. Keep in mind that natural stone typically needs to be sealed to help protect it from stains.
If you love a handcrafted, one-of-a-kind look, zellige tile is worth a close look. Made using traditional techniques, each tile has slight variations in color and texture, so the finished wall has real depth. It brings a warm, lived-in feel to a kitchen, especially against simple cabinetry.
Your backsplash is part of a bigger picture that includes your floor, and getting the two to work together makes the whole kitchen feel pulled together instead of pieced apart.
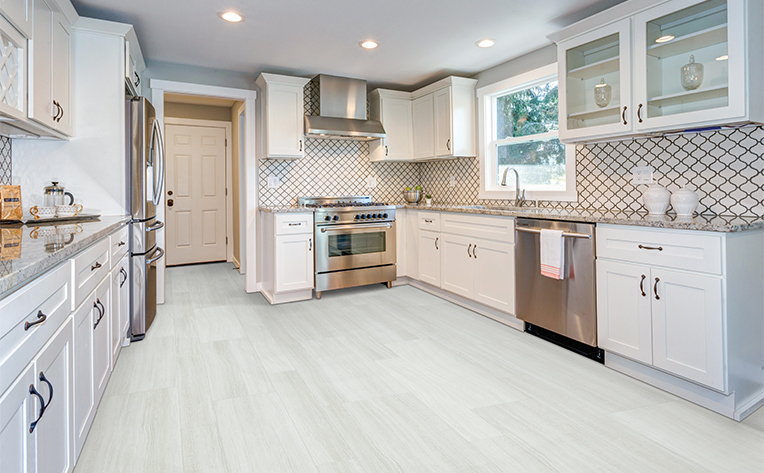
If your flooring has a lot of character, like a bold wood-look grain or a busy pattern, let your backsplash play a quieter role so the two don't compete for attention. A simple subway tile or soft, solid color gives your floor room to shine.
On the other hand, if your flooring is more neutral or understated, that's your cue to have more fun with the backsplash. A bold color, a textured zellige tile, or a geometric pattern can add all the personality your kitchen needs without clashing with what's underfoot.
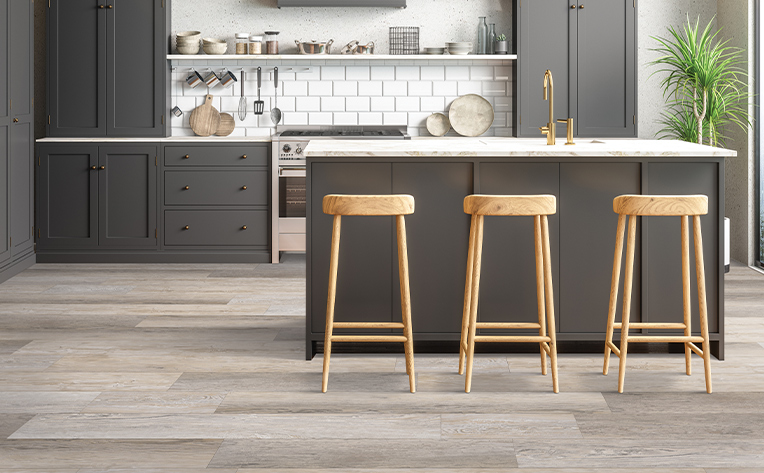
It's also worth thinking about warmth. Wood-look flooring with warm, honey tones tends to pair beautifully with earthy backsplash colors like terra-cotta or warm stone, while cooler gray or whitewashed flooring often looks best with crisper whites, blues, or greens.
Most kitchen backsplashes run from the countertop up to about 18 inches, which is typically where the upper cabinets begin. For the full-height look that's so popular right now, tile can continue all the way up to the cabinets or ceiling for a more dramatic effect.
It really depends on your countertop and your kitchen. Lighter backsplashes tend to open up smaller spaces, while darker or higher contrast tile adds drama in bigger kitchens with plenty of natural light. If your countertop already has a lot of movement or veining, let a quieter tile keep the attention there. If it's simple and solid, a bolder backsplash gives the room some personality.
While it's not required, it's one of the smartest places to have one. That stretch of wall takes the most heat and steam of anywhere in the kitchen, so a tile that's easy to wipe down goes a long way. It's also a natural spot to go a little bolder with pattern or color, since it's a small enough area that a statement tile won't overwhelm the room.
Here are few things are worth thinking through before you settle on a plan for your kitchen:
Redesigning your kitchen backsplash isn't just about keeping up with the latest trends. It's about creating a space you'll love every time you walk in, from the tile on your walls to the floor underneath it. The good news is you don't have to figure it all out on your own. Our friendly team is ready to help you find the right tile, the right pattern, and the right plan for your whole kitchen. Don't wait to contact us today and get started on your dream project.